
Well if I can't paint it, how do I make it my own? Hmmm...oh I know! Besides of the obvious of changing the drawer pulls, which I'm still struggling to find ones that will fit in the pre-cut holes. Then what else, is there to do? I was stuck here too until I found a couple yards of zebra fabric that has been sitting in my closet since high school. *gasp*
I measured the inside of the drawers and (thank the crafting gods) had enough to cover the bottom of every drawer. It's pretty simple. Take the measurements of the drawers and then cut out the fabric in accordance. If you're anything like me though, I can not cut in a straight line. So I slightly over cut every drawer to ensure that I'd have access to trim off after placing inside the drawer. Check out my zebra drawers. =]
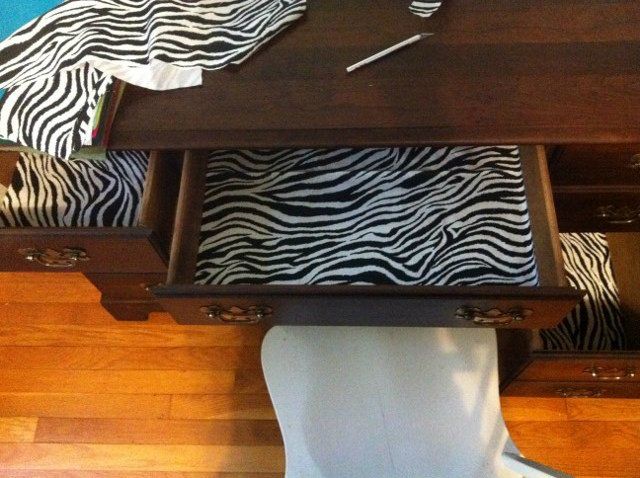
What's so great about this is that I didn't tack it down or attach it to cardboard, so I can take it to change it up whenever I want...(there's more after the jump!)
As a kid I could never organize my desk and in college my desk never had drawers, so there wasn't much to organize. Out of the 7 drawers my new desk has, 3 1/2 are full of crafting stuff. Crayons, stamps, glue sticks, beads, color pencils, ink, and I could go on. I didn't feel like shelling out money for pre-made desk organizers and I was pretty eager to actually use my desk. So I went poor college student and took some blue solo cups (from my beer pong days) that have been
.jpg)
Pretty cheap and customisable right?
.jpg)
 |
| Sorry it was really sunny. =] |
Probably cheapest idea I've had all week. Now I'm proud to say that the drawers of my desk are personalized and organized. Hopefully soon I'll find some new pulls or pick a color to paint them. Oh yeah and tackle organizing the top of my desk, eek. Look for part 2 in the near future!

No comments:
Post a Comment